These days we all know how easy it is to record usability testing sessions on a desktop computer. You can use Silverback on a Mac ($69.95), Morae on PC ($1,495) or you can try one of the many other screen recording tools on the market today.
If you need to record research footage from a device that doesn’t support software recording (e.g. a Kindle), then you’ll need to point a camera at its screen. This is simple if you don’t want picture-in-picture: you can make a sled like this, mount a webcam on it and record the footage using any free recording app (like Quicktime). If you want picture-in-picture, then it’s a little more complicated but still doable. On a Mac, you can fudge Silverback to record from a second webcam by using an app like macam to display that webcam’s footage on your desktop. If you’re on PC, you can use AmCap ($29) in a similar manner or Morae in its “mobile device study” mode [PDF].
However, specialist UX research agencies often use “Pro” video production hardware for multi-camera recordings. Even though this is far more expensive than software, the results can be better – often giving higher frame rates, better resolution, and less chance of drop-outs when transmitting live footage.
Speccing up your own hardware rig can be an intimidating prospect. Luckily, my friends at Amberlight (a London-based UX research consultancy) have agreed to share the specs of their rig, so you can create your own.
Before I start, I want to preface this little instructable with an important point: the quality of your research is determined by the skills of your team, not by the recording equipment they use. The point of a rig like this is simply to ensure that stakeholders can watch the live session clearly from another room, and so that good quality highlights can be shared. This helps with buy-in and decision-making, but don’t loose any sleep if you can’t afford it.
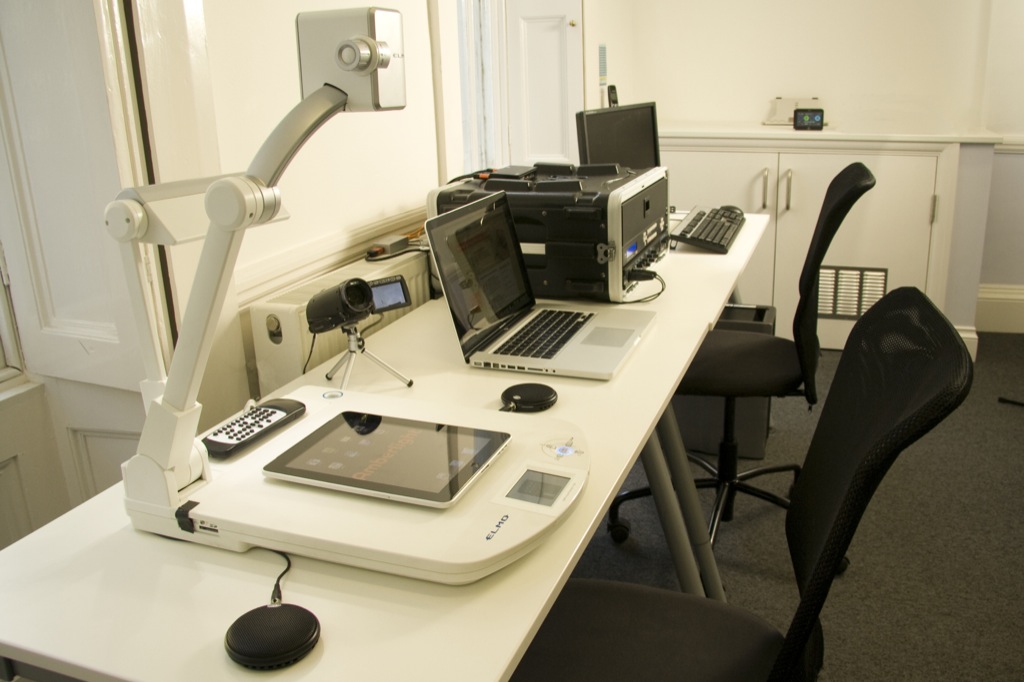
The first component we have here is an ELMO P30s document camera. You may have seen this sort of thing on lecterns in lecture theatres. It costs about $2000, but with the price tag, you get a good lens, good resolution (1280 x 720) and a high frame rate (30 fps).
Some researchers don’t like document cameras, saying that they cause participants to hold the test devices in an an unnatural fashion, and that they often hold them out of shot or at the wrong angle for the camera. This is true, but document cameras are still useful because they are so general purpose. You can shove anything underneath one start recording straight away.
In the picture below, you can see the next component – an HD DV camera on a tripod, pointed at the participant’s face. This gives you the second video feed for your picture-in-picture output.
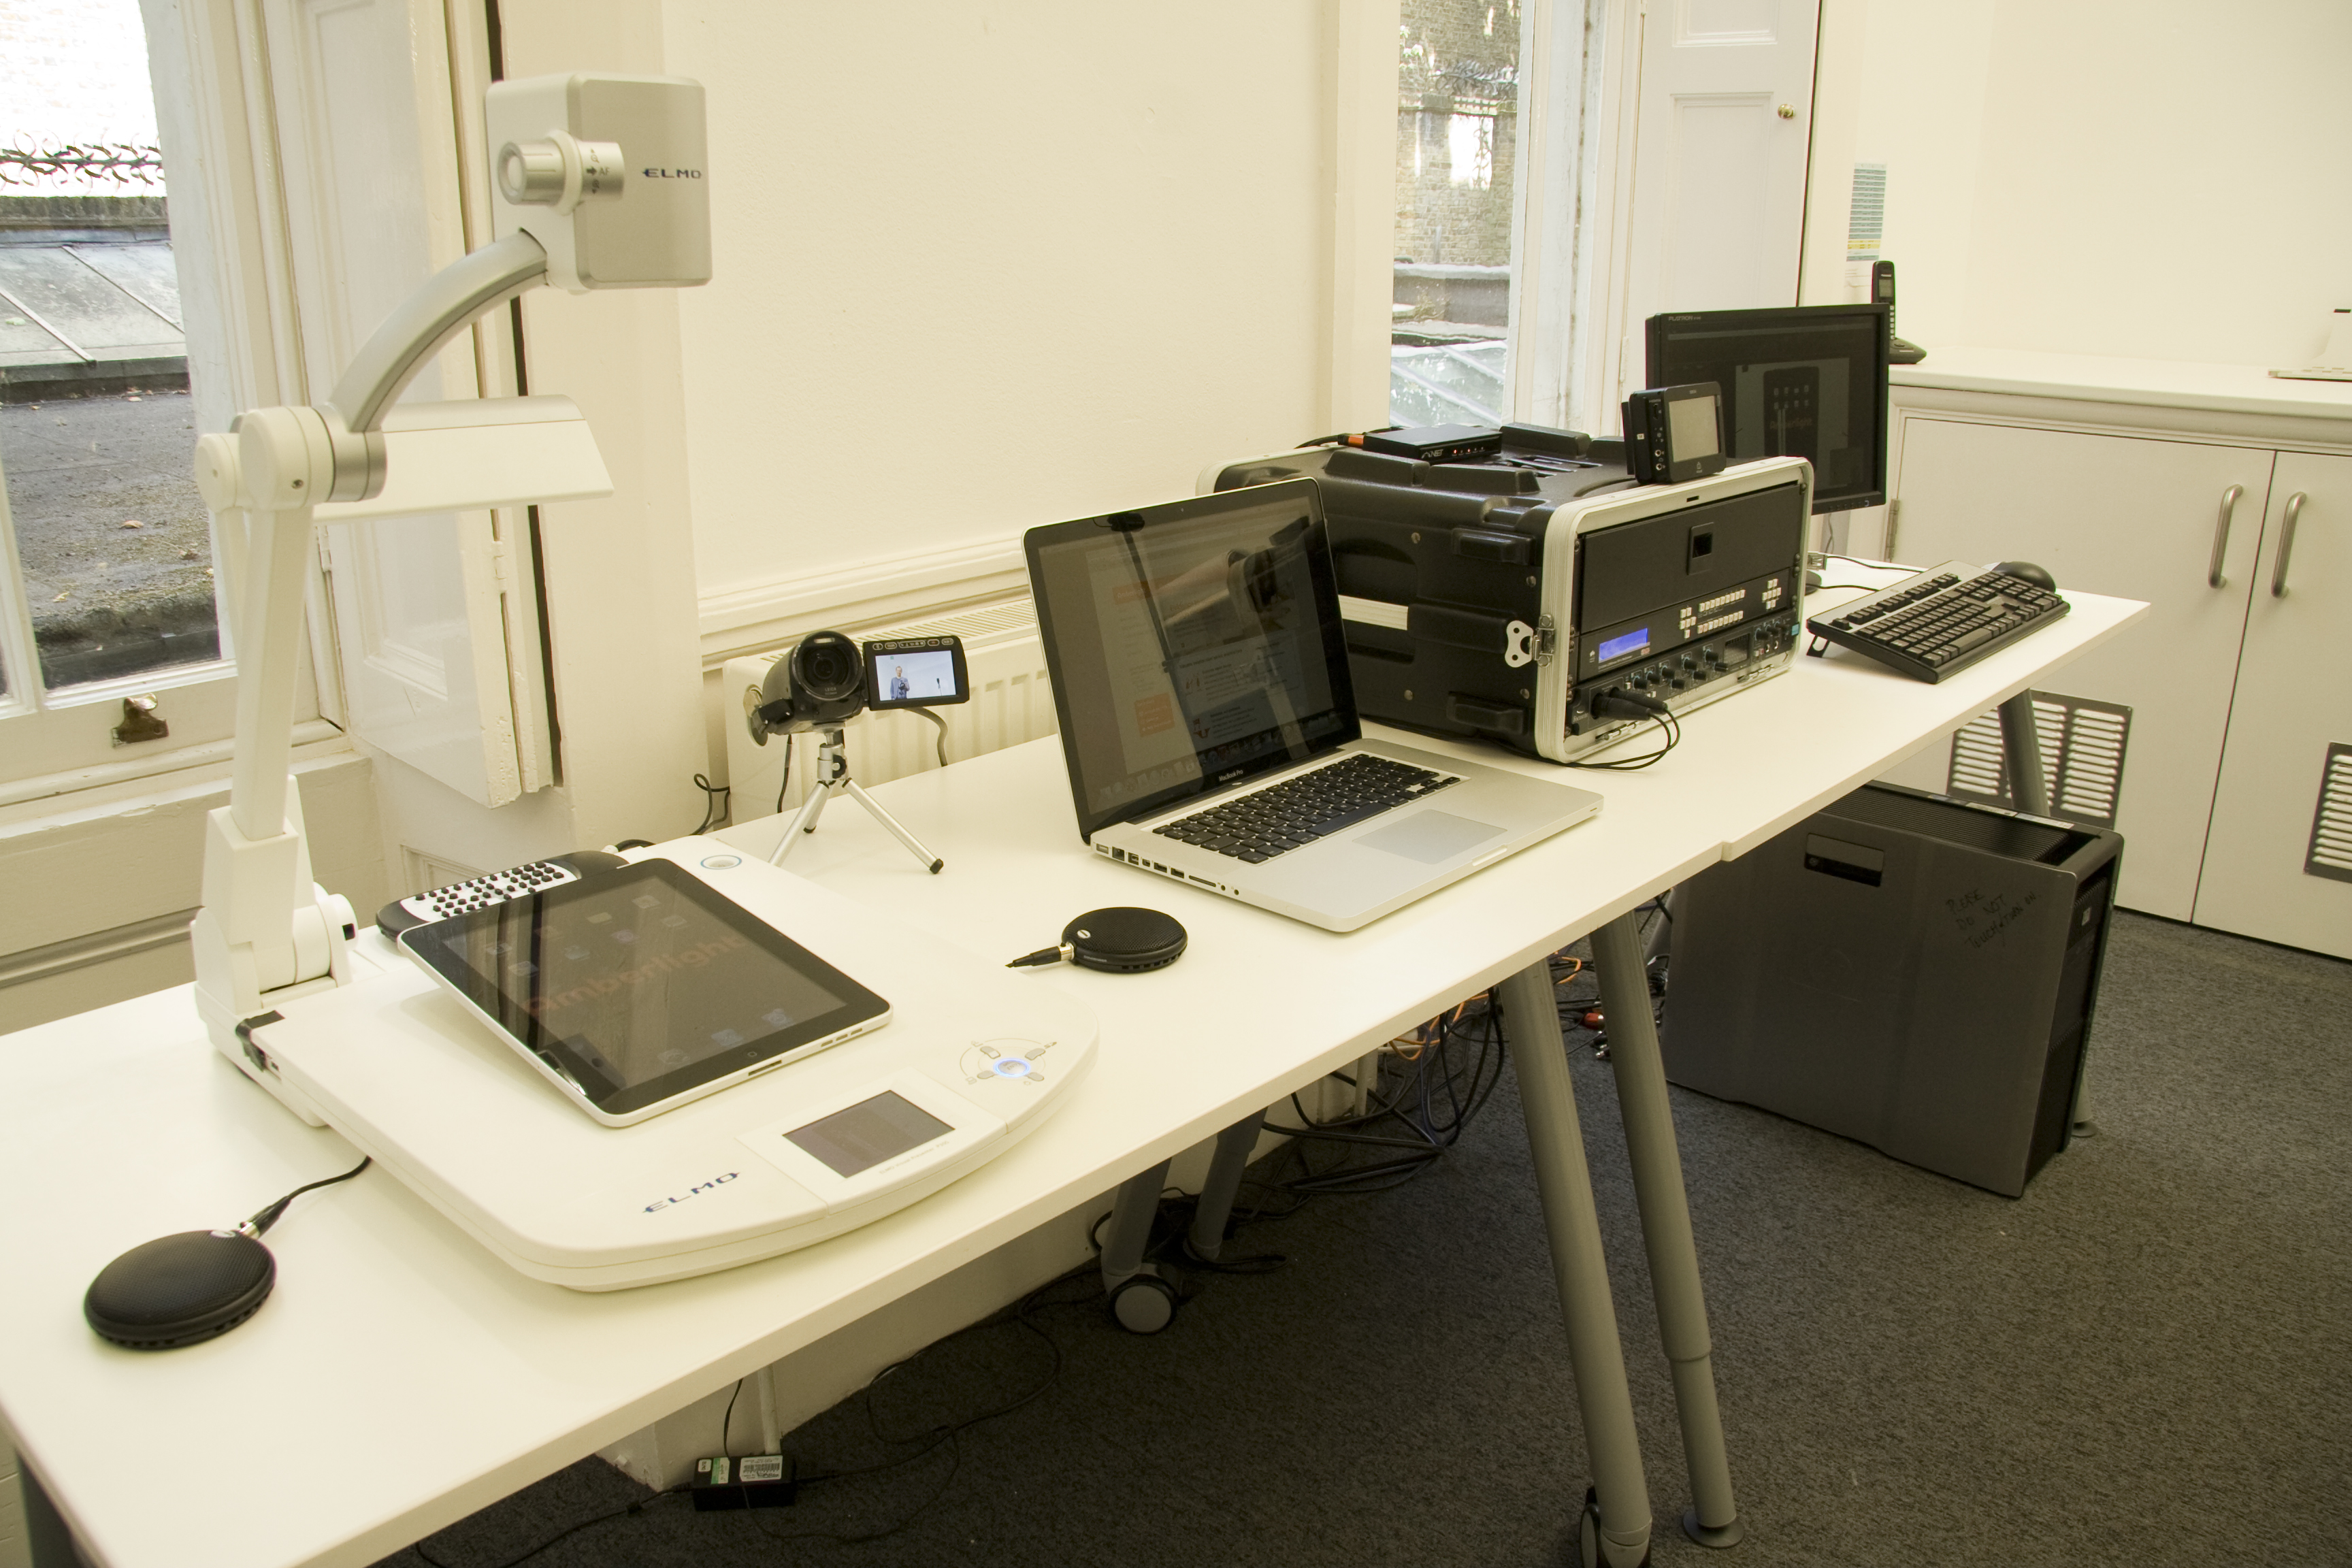
Both video feeds are run into an HD Video Mixer (a “TV One C2-6104a”, approx. $4200) shown below.
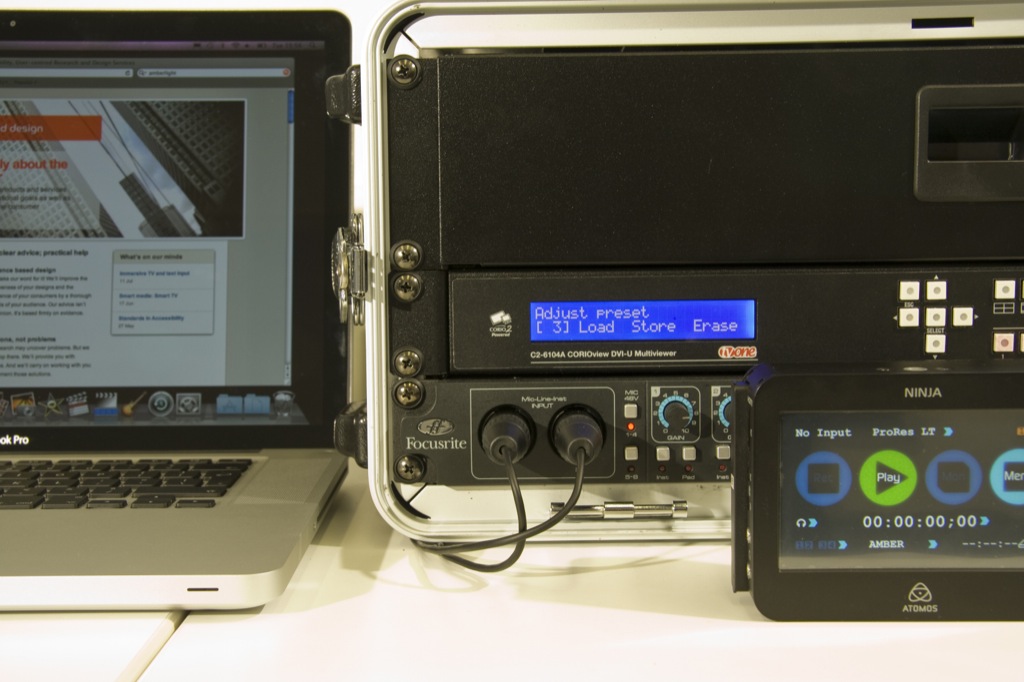
This video mixer is used to create the picture-in-picture (PiP) composition. It’s important to use an HD mixer so the resolution of your footage doesn’t get reduced at this stage. The audio from two boundary microphones is also mixed together, using an audio mixer (a Focusrite Pro Studio Audio Interface).
Next, we get the picture-in-picture footage output as HDMI, which is fed into an HDMI splitter (pictured below). One feed is sent to a recording device, the other is run into another room in the building for live viewing.
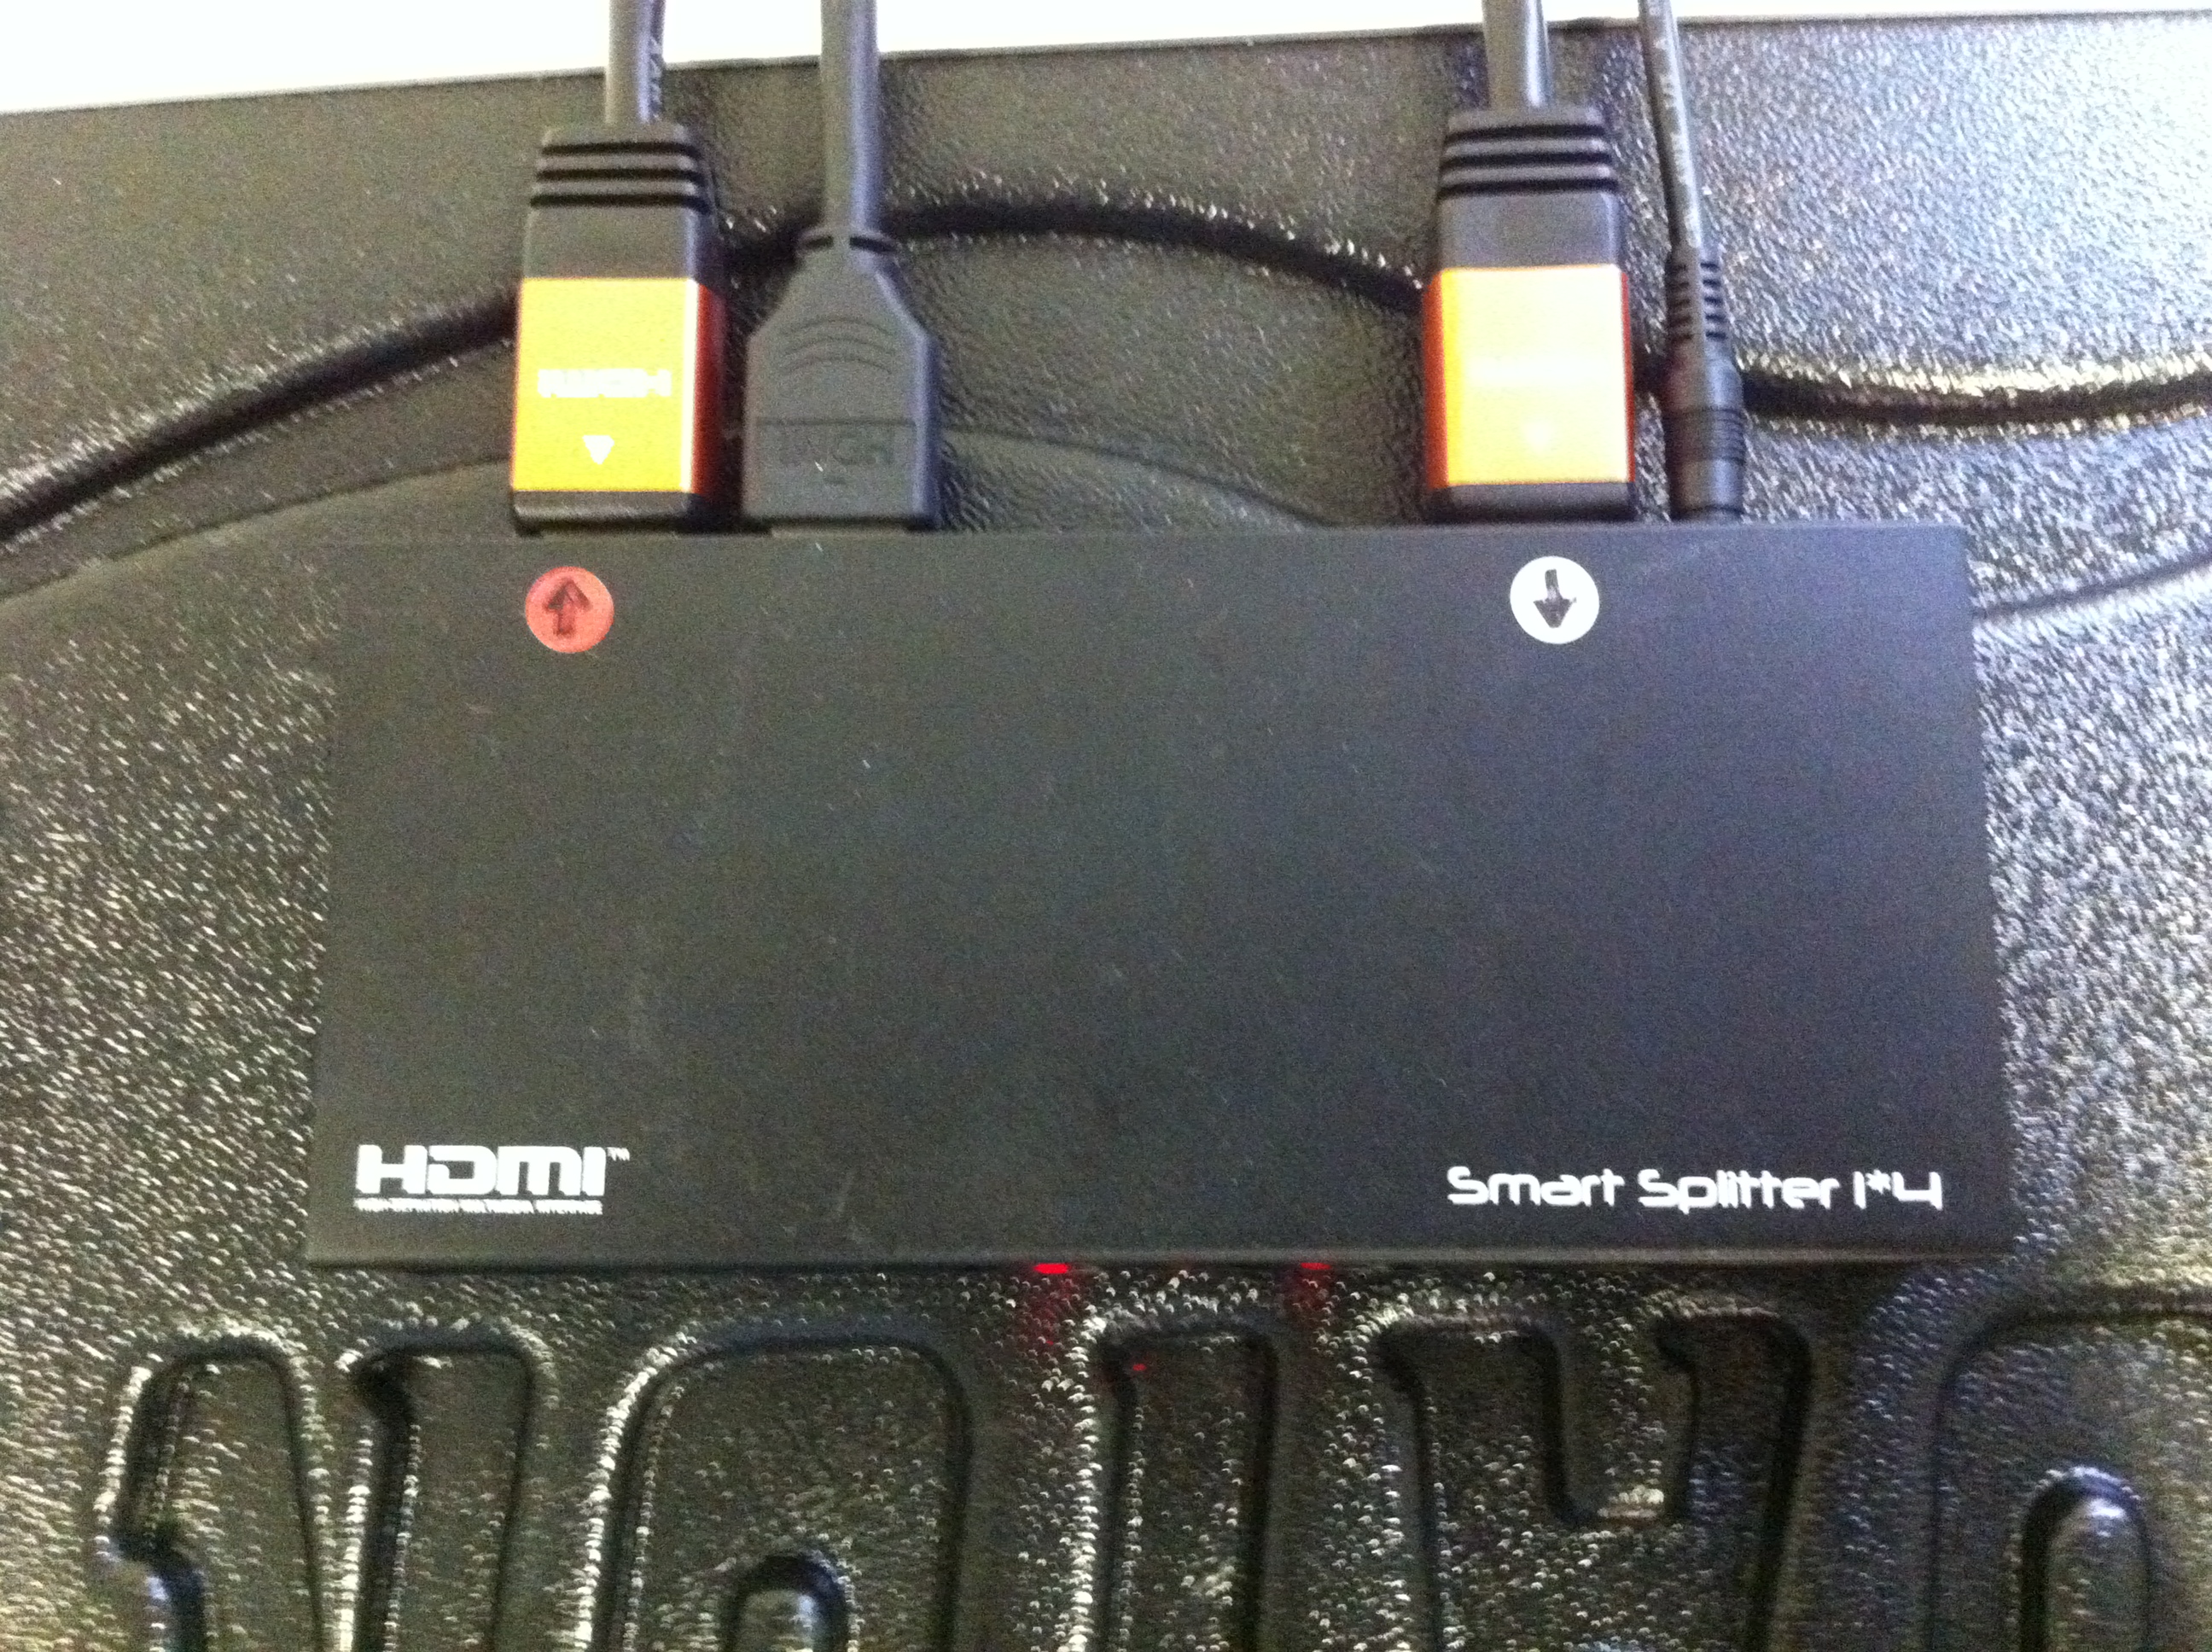
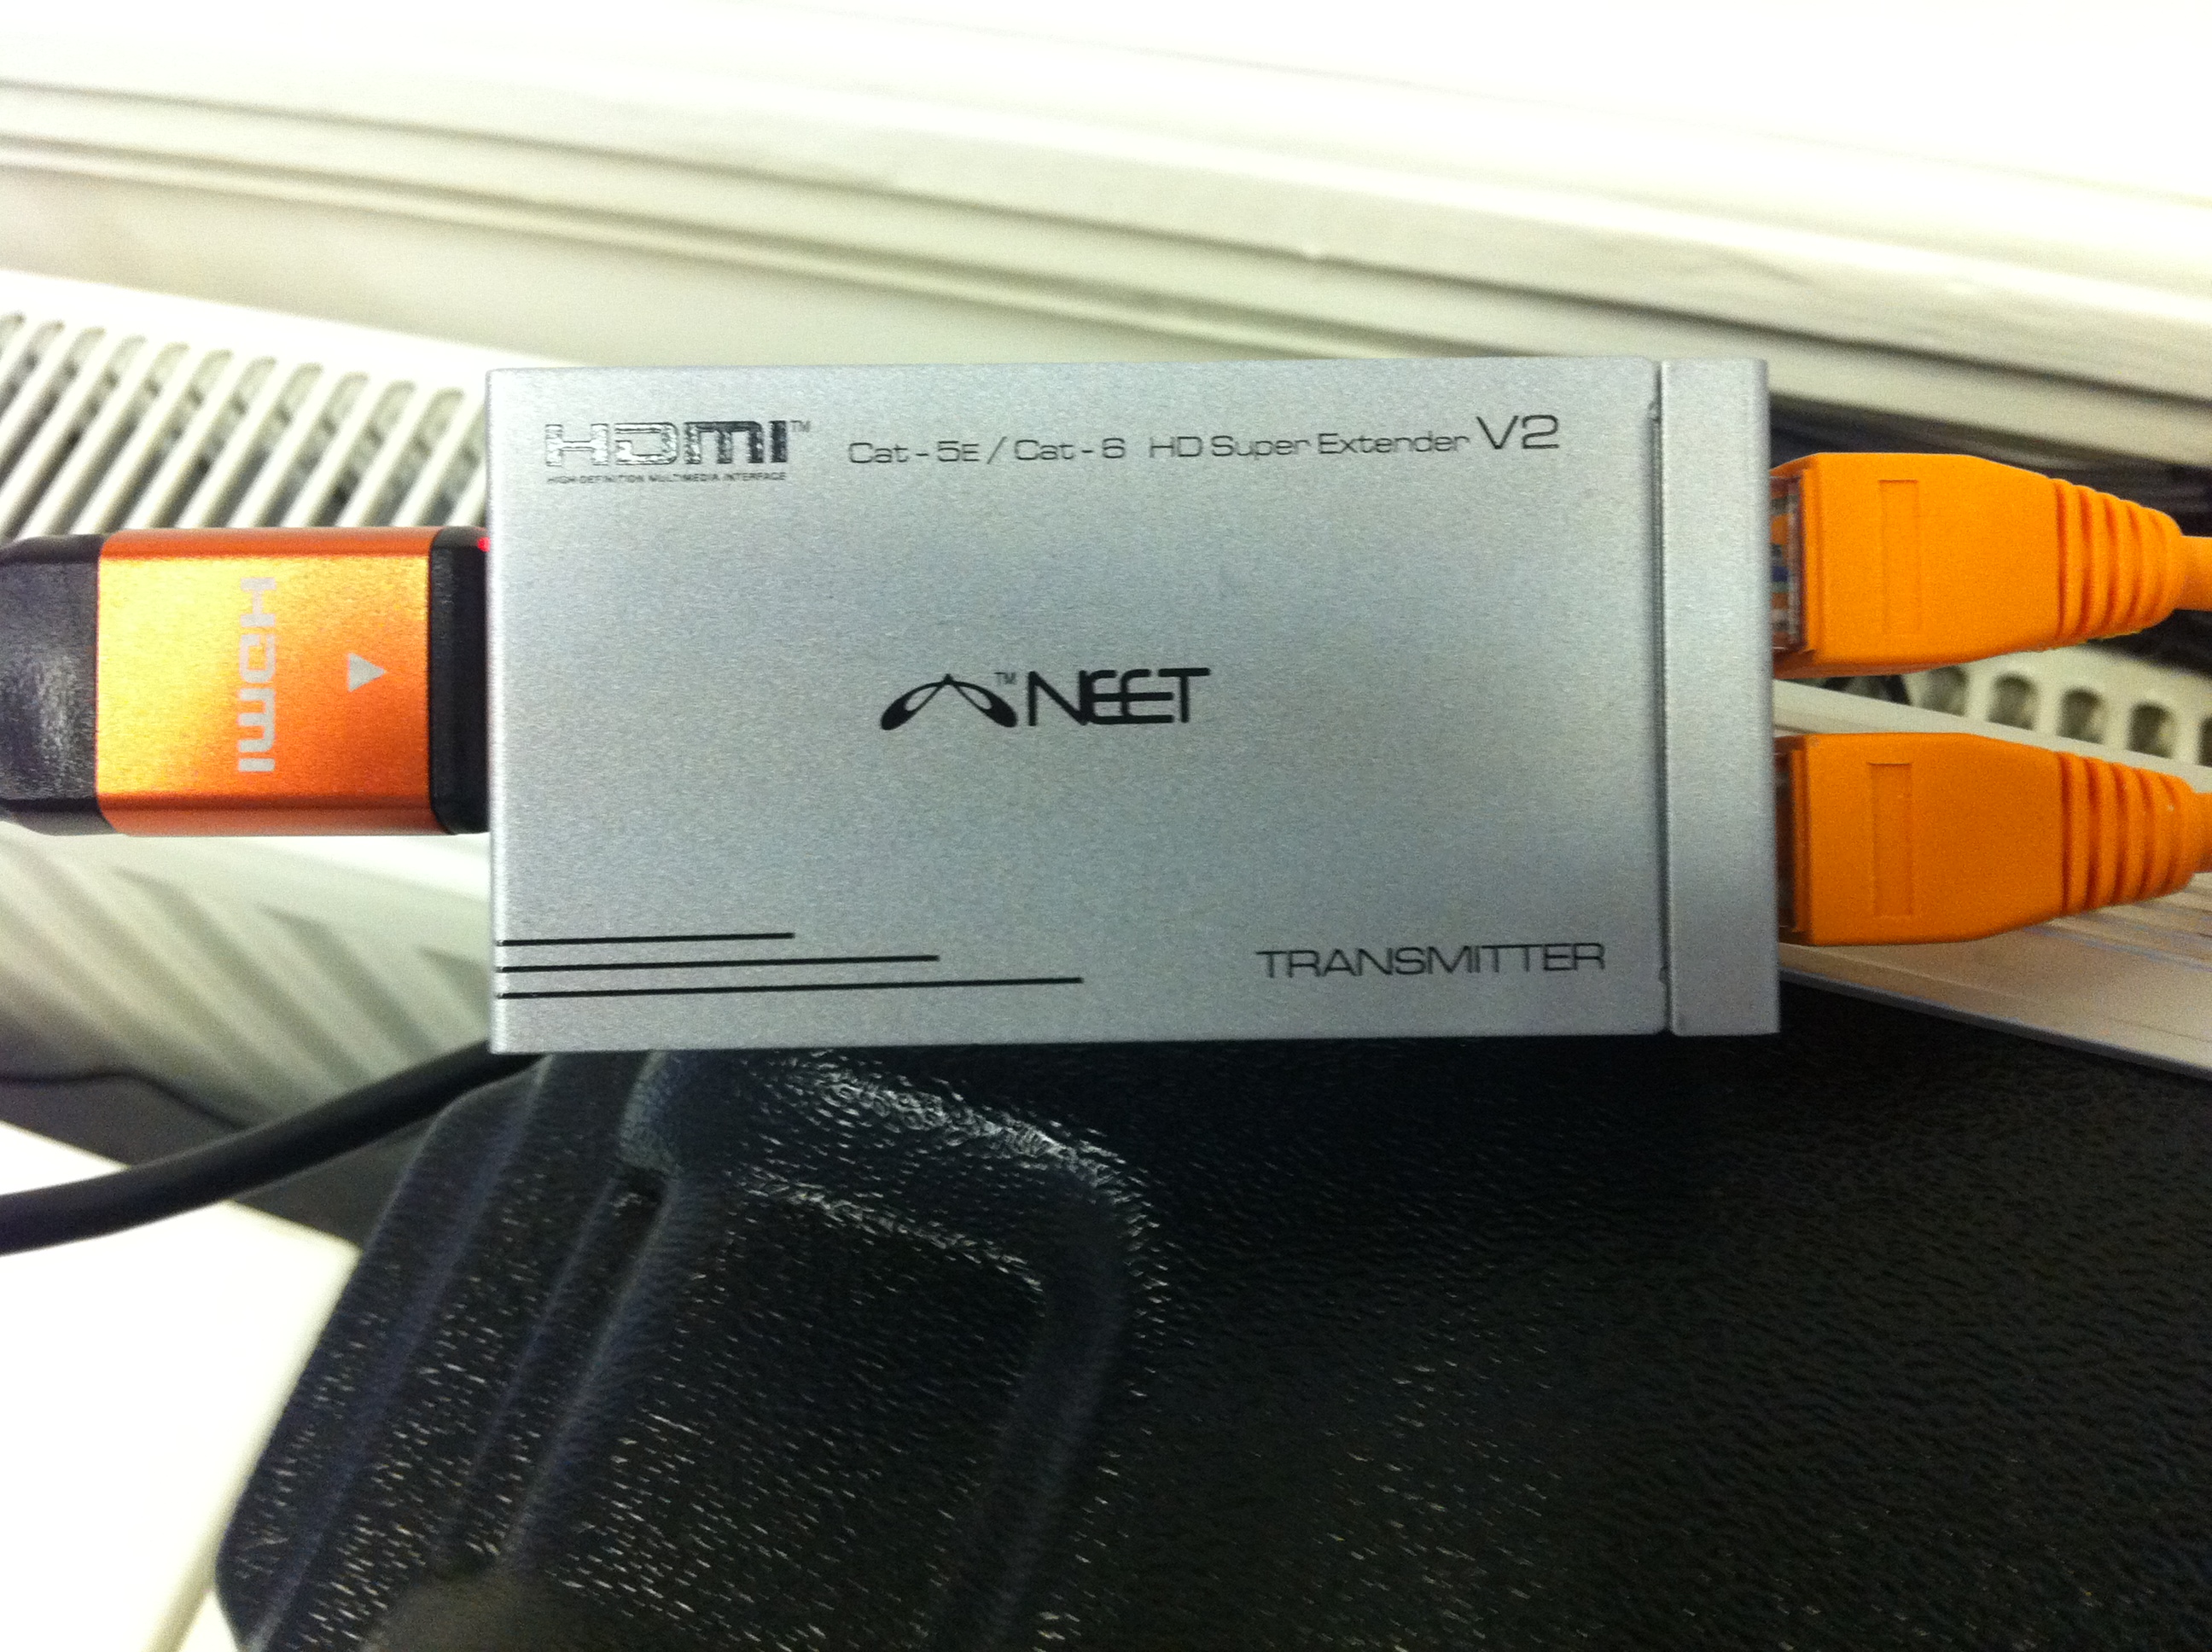
Since HDMI cables are expensive and don’t work well over long distances, the cable is fed into a CAT extender (pictured below), so that the signal is transmitted over a standard ethernet cable.
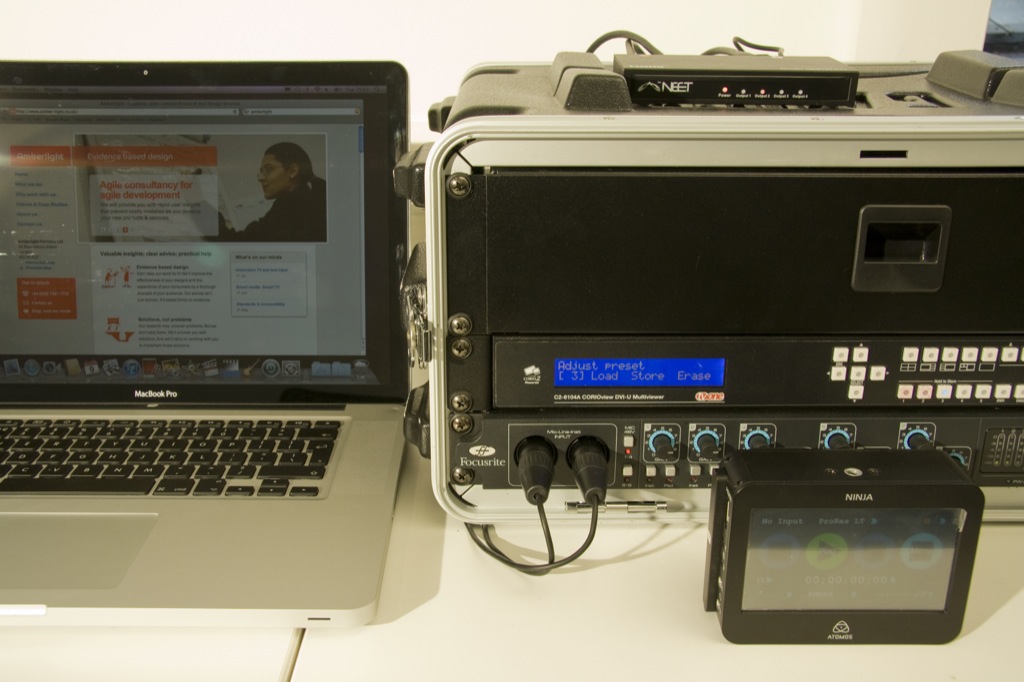
In the picture below (front right), there is a small HDMI hard disk recorder (an Atomos “Ninja”, approx. $1000). This little thing takes the video input and records it directly to hard drive, no laptop need. Alternatively you can record your footage onto a PC or Mac using an HD Video Capture Card.
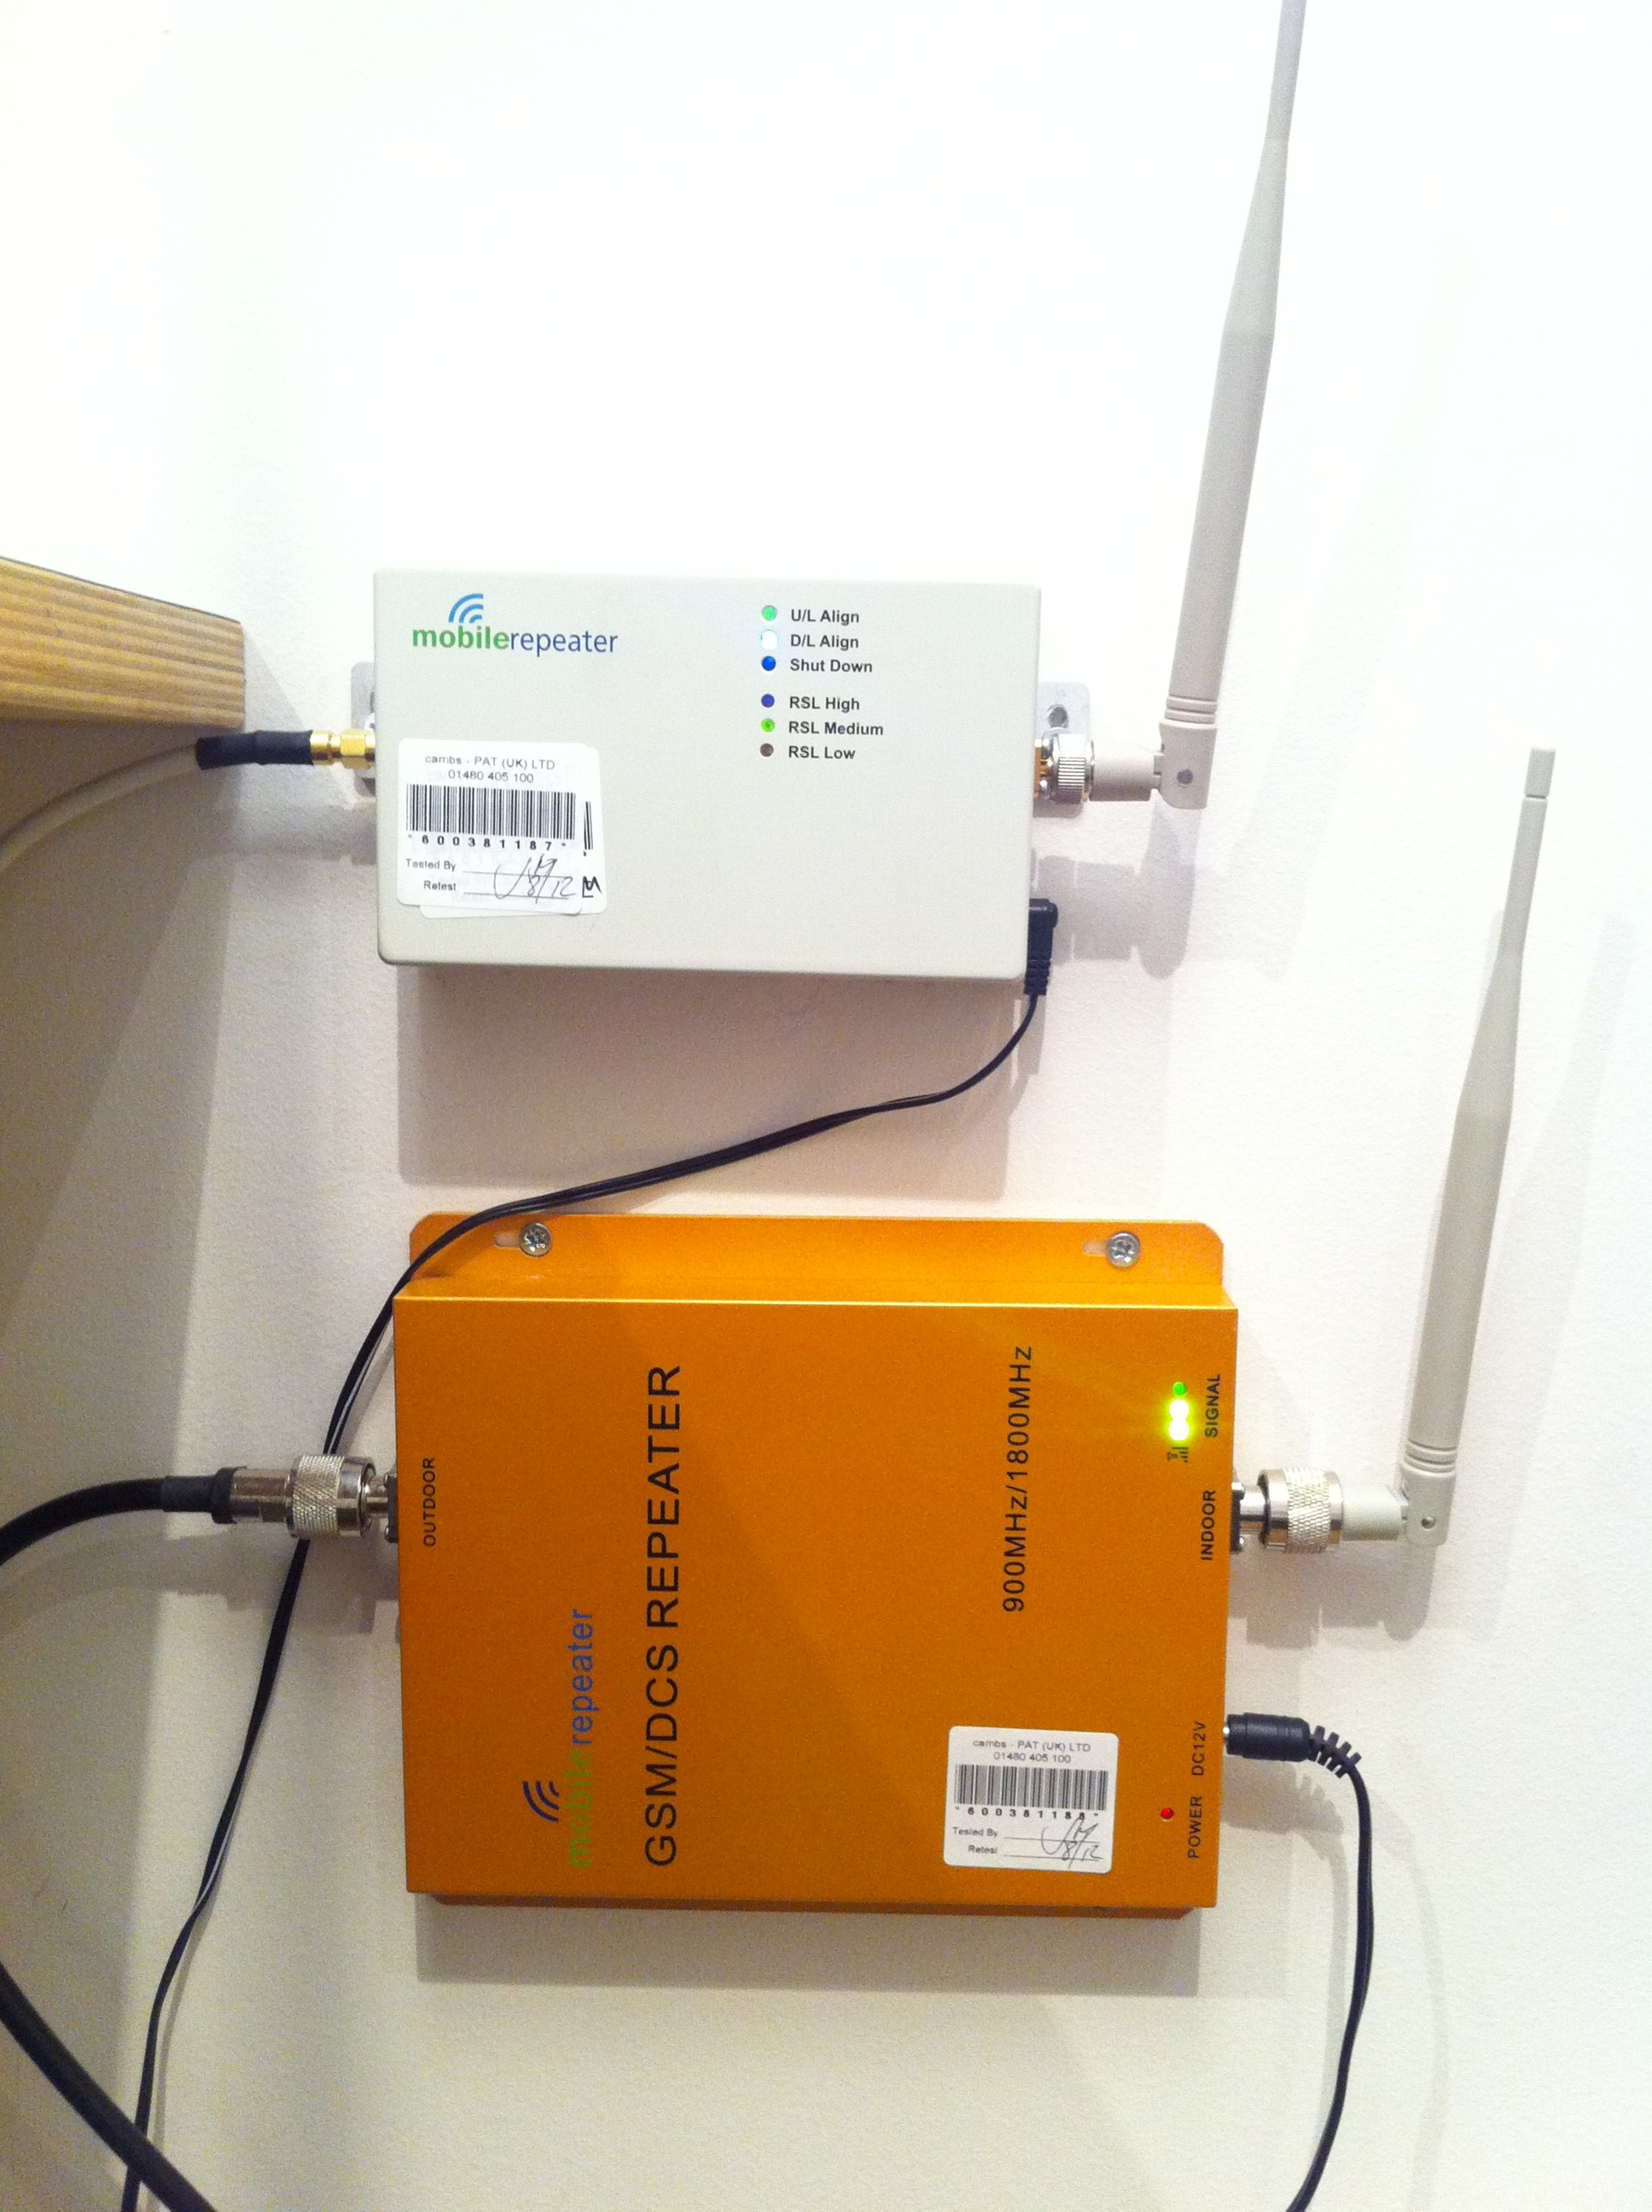
Also of note in the Amberlight lab is a couple of femtocell boxes, pictured below. These are mobile network signal extenders, so they ensure good 3G coverage within the lab. To test low connectivity they simply turn these boxes off.
So that’s pretty much it. Huge thanks to Amberlight for being so open and willing to share! If you have any suggestions about better/cheaper/different rigs then please post them in the comments below.
Wirecast is an OS X application that records from multiple cameras simultaneously and can stream too.
http://tinyurl.com/9mkp9b
Haven’t tried it myself. Perhaps worth reviewing?
Hi Harry,
Really interesting post. I’ve worked at a couple of UX consultancies and they both had very different setups for recording sessions (outside of Morae/Silverback).
For example, one of them uses a wide angle lens to capture workshop sessions on a single camera.
However, neither of them have the capability to record in HD and it is something I have been investigating.
One thing I would disagree with is that HDMI cables are expensive. You can pick up a 10m cable for about £5 now. On the other hand, I suppose you could say they are expensive relative to CAT5 cable.
I don’t suppose you can recommend any Mac compatible HD Video Capture Cards?
Thanks,
Matt
The problem with HDMI cables is that the price ramps up when you need a really long one. I understand that ethernet is better for long distances.
Not sure about HD vid capture cards. Let us know if you find one you find works well.
The price of HDMI cables does ramp up quite quickly, but on the other hand you have to factor in the cost of the HDMI to ethernet converter if you don’t already own one. So it depends on exactly how far the signal needs to travel…
I’ll let you know if I find a good capture card.
Thanks again,
Matt
Pingback: I fix UX » SprzÄ™t do nagrywania badaÅ„ na urzÄ…dzeniach mobilnych